Eldredge Knot Tie
Eldredge knot is an unconventional, complex, and eye-catching necktie knot consisting of 15 different stages. This tie was invented in 2007 by Jeffrey Eldredge and gained Internet fame in 2008. He created the Eldredge knot in search of one that was both eye-catching and attention-seeking. Unlike the vast majority of tie knots, the Eldredge knot is manufactured using the short end as the active end.
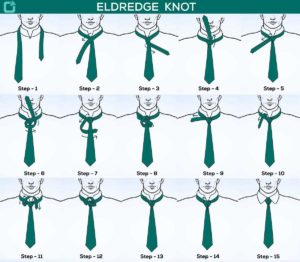
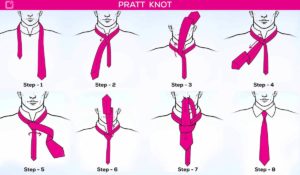
The Knot Tying Steps, View in One Image.
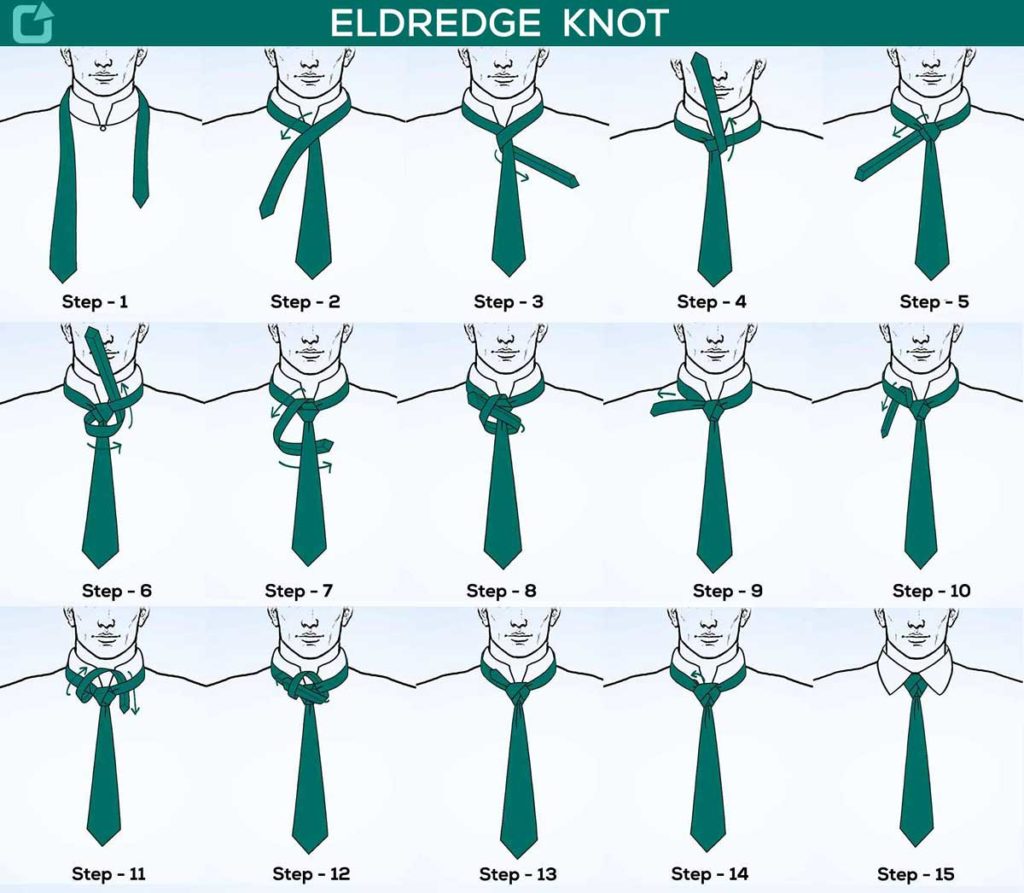
The Eldredge Knot Step-by-Step instruction.
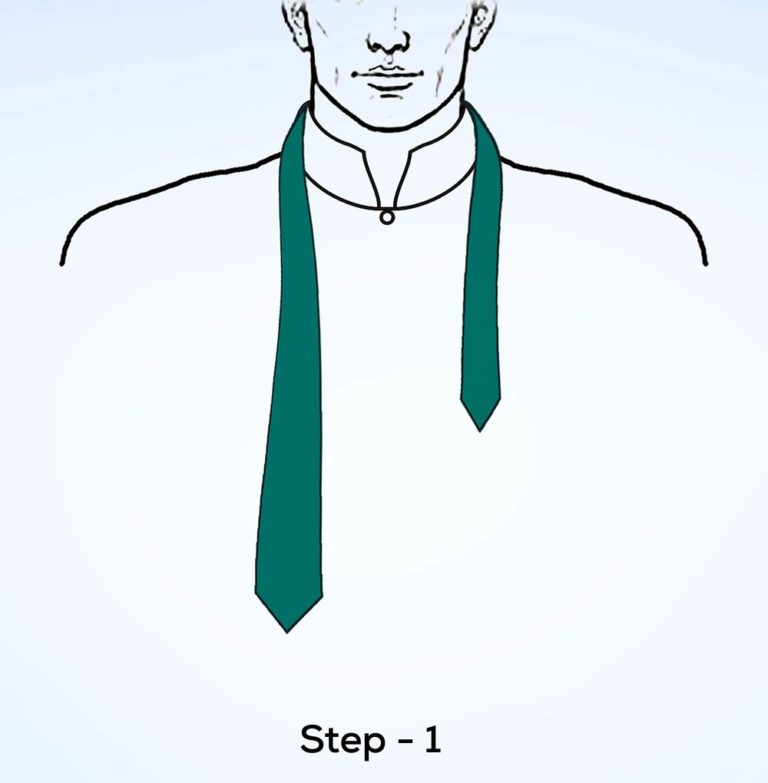
STEP-1
Guys let’s start first step, With the wide end of the tie on the left and the short end on the right. The tip of the wide end should rest on the top of your belt buckle. Only move the active small end.
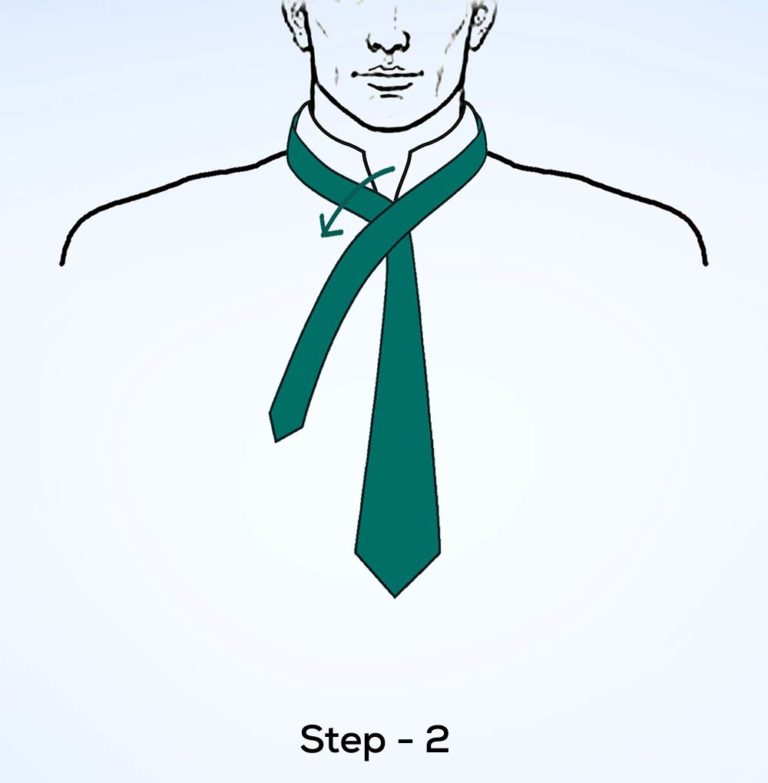
STEP-2
Second step, Small end over the wide end to the left.
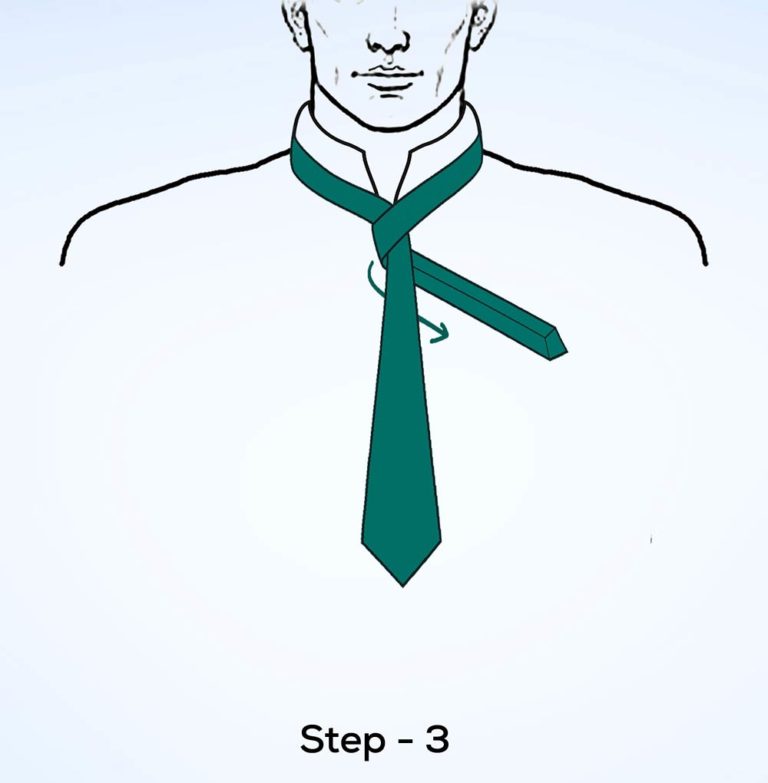
STEP-3
Third step, Under the wide end and to the right.
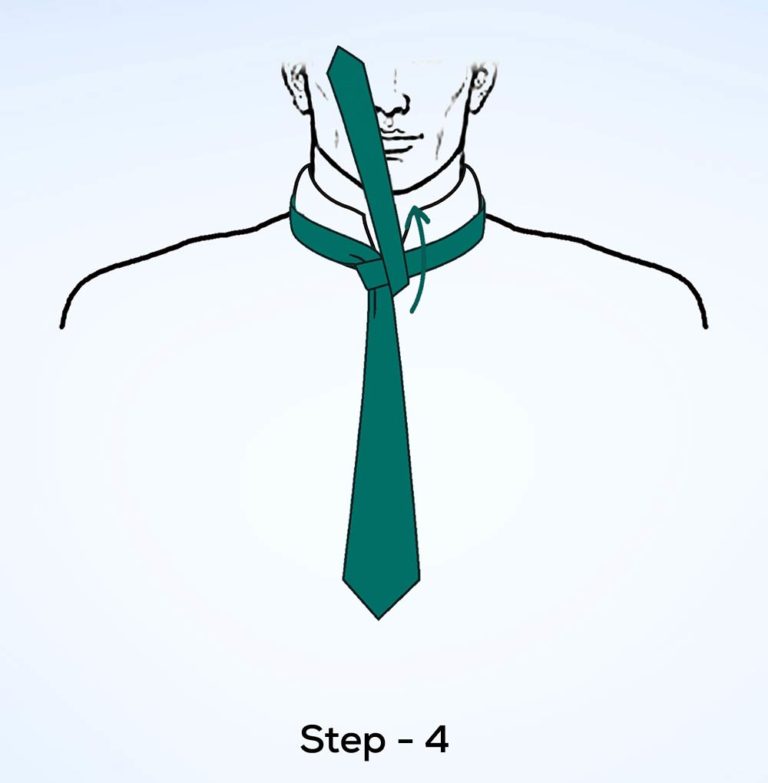
STEP-4
Fourth step, Up to the center, towards neck loop.
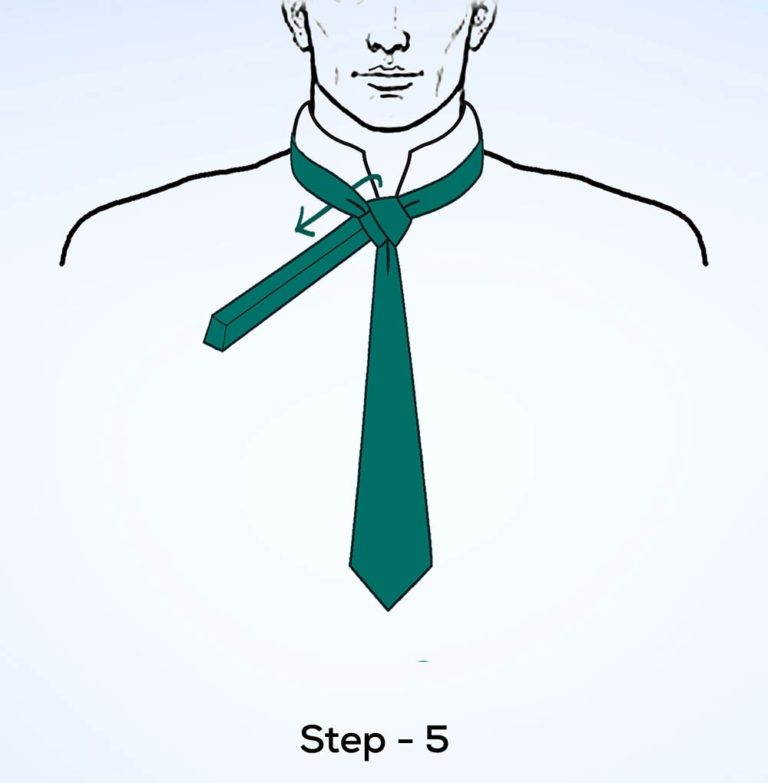
STEP-5
Fifth step, Through the neck loop and to the left.
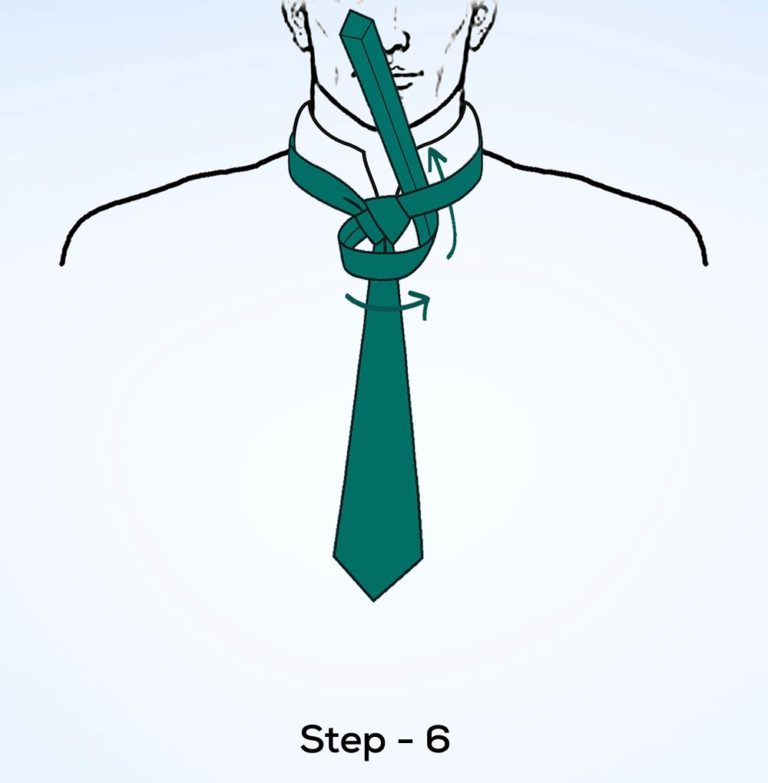
STEP-6
Sixth step, Front side, right side. Then from the bottom to the neck loop.
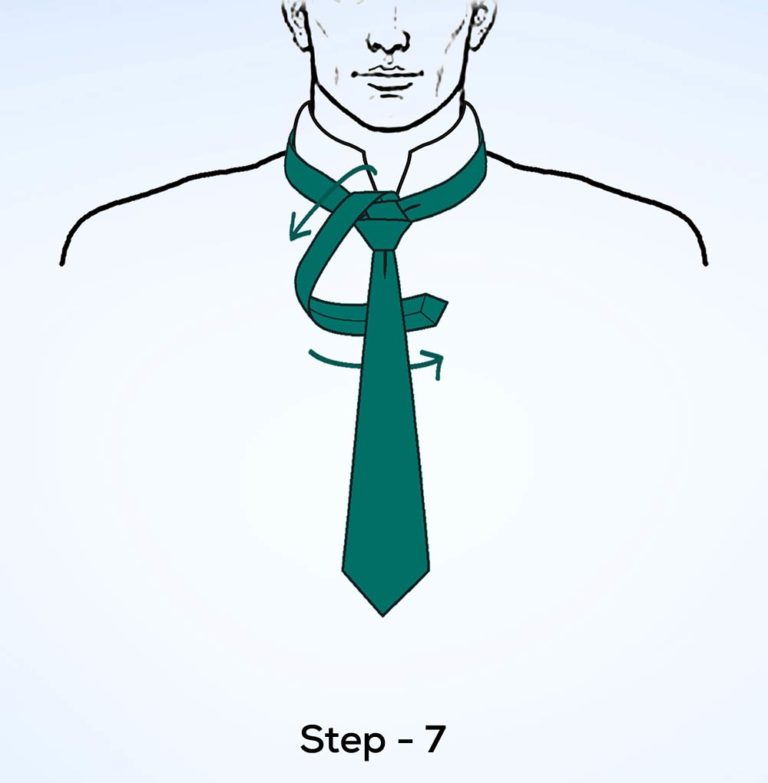
STEP-7
Seventh step, Down to the left and around the back of the wide end to the right. Keep this part loose.
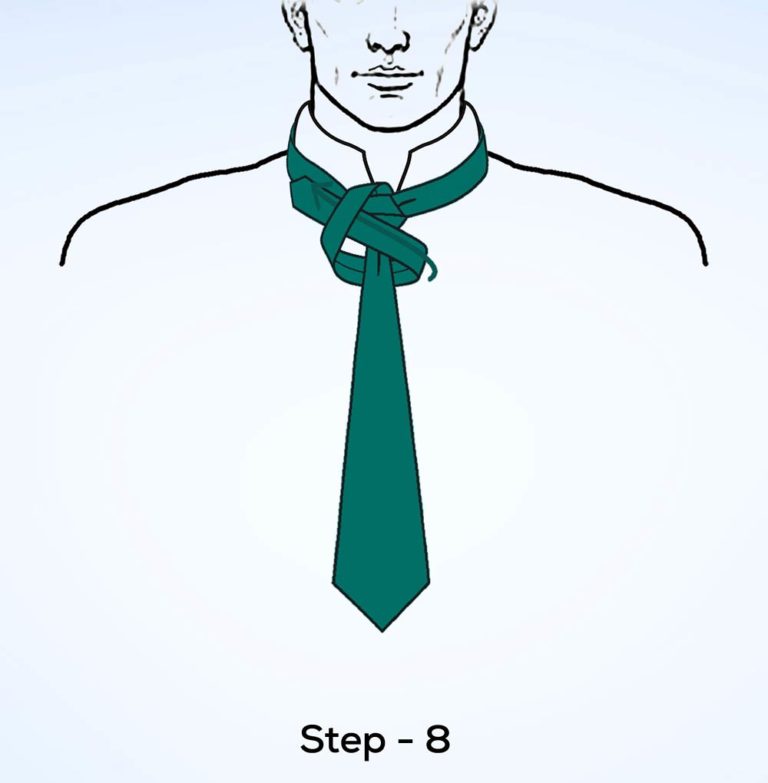
STEP-8
Eighth step, Bring it to the left and through the loop made in the previous step to the front.
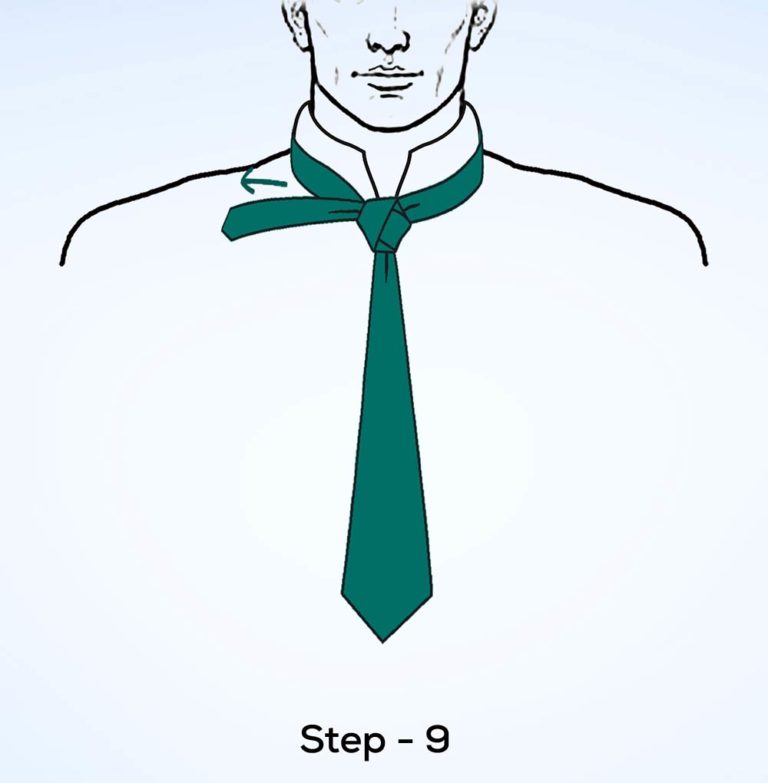
STEP-9
Ninth step, Pull the small end towards the left to tighten.
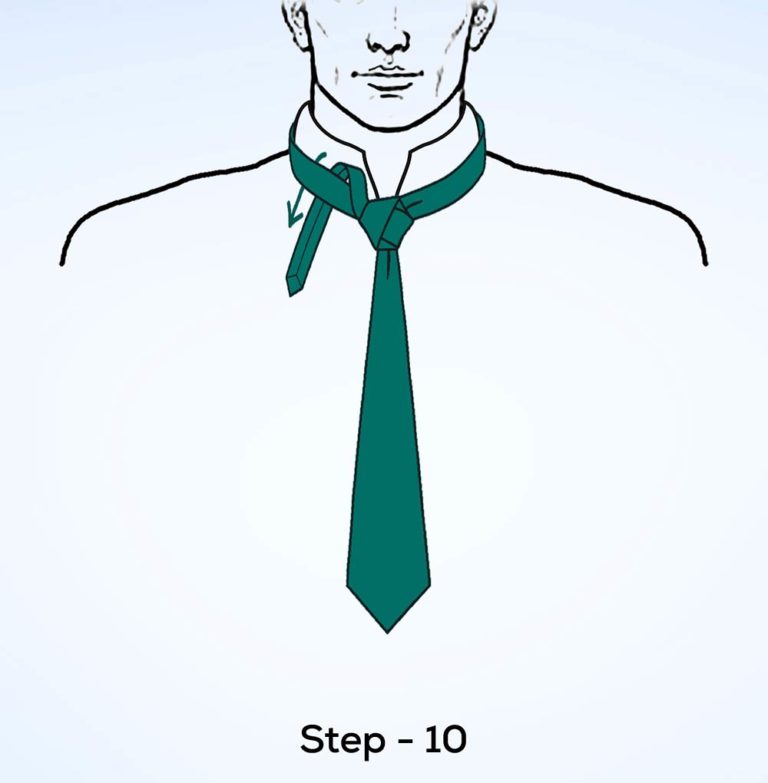
STEP-10
Tenth step, Up to the center, towards neck loop. Down through the neck loop and to the left.
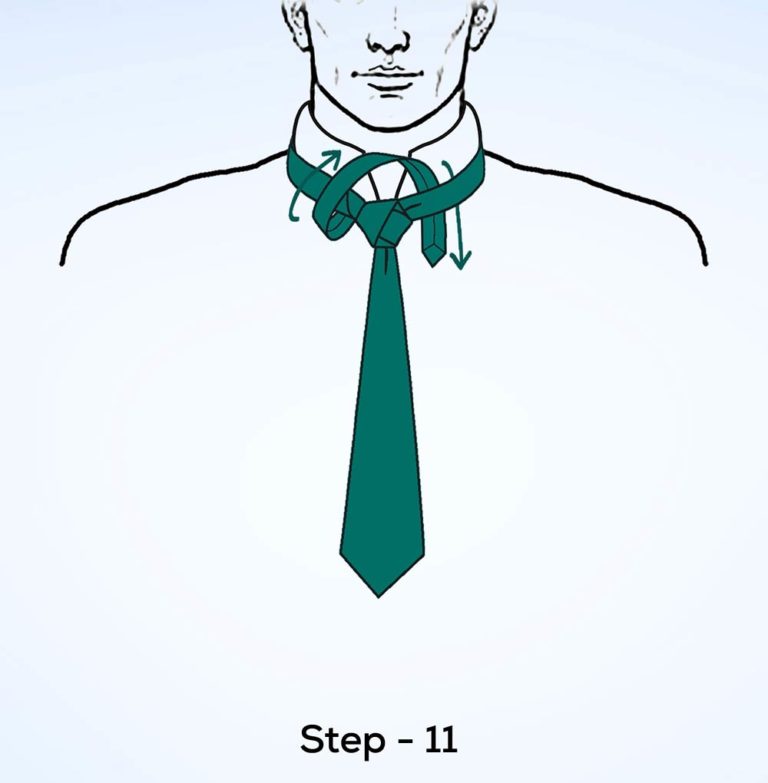
STEP-11
Eleventh step, Up to the center, towards neck loop. Down through the neck loop and to the right. Keep this part loose.
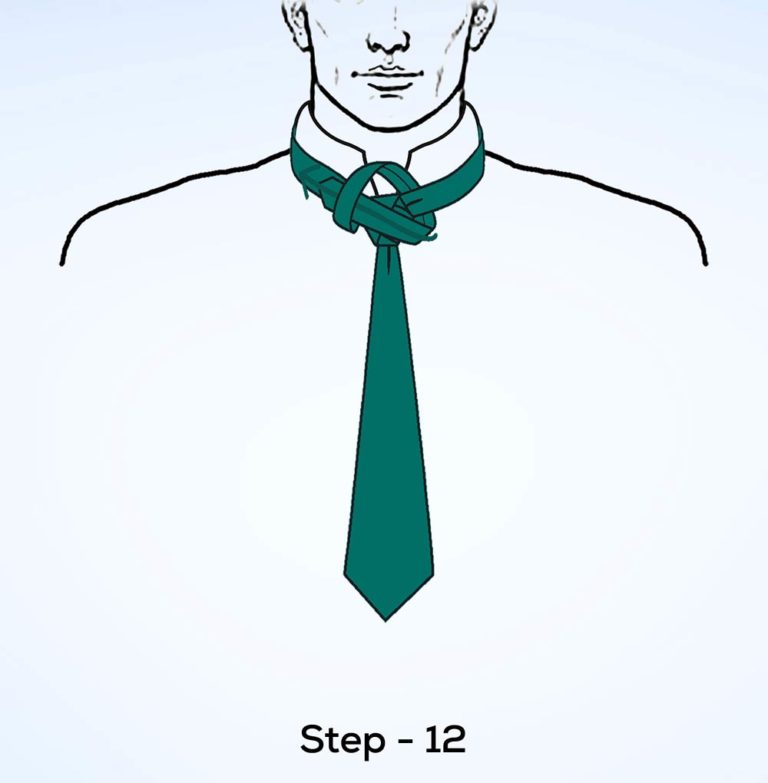
STEP-12
Twelfth step, Across the front towards the left and through the loop made in the previous step.
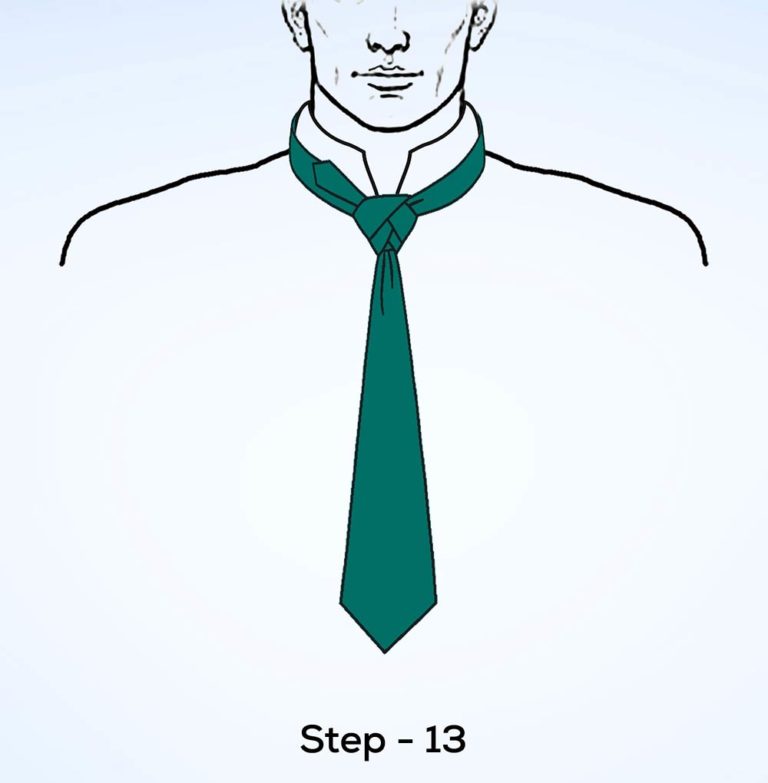
STEP-13
Thirteenth step, Pull the small end towards the left to tighten.
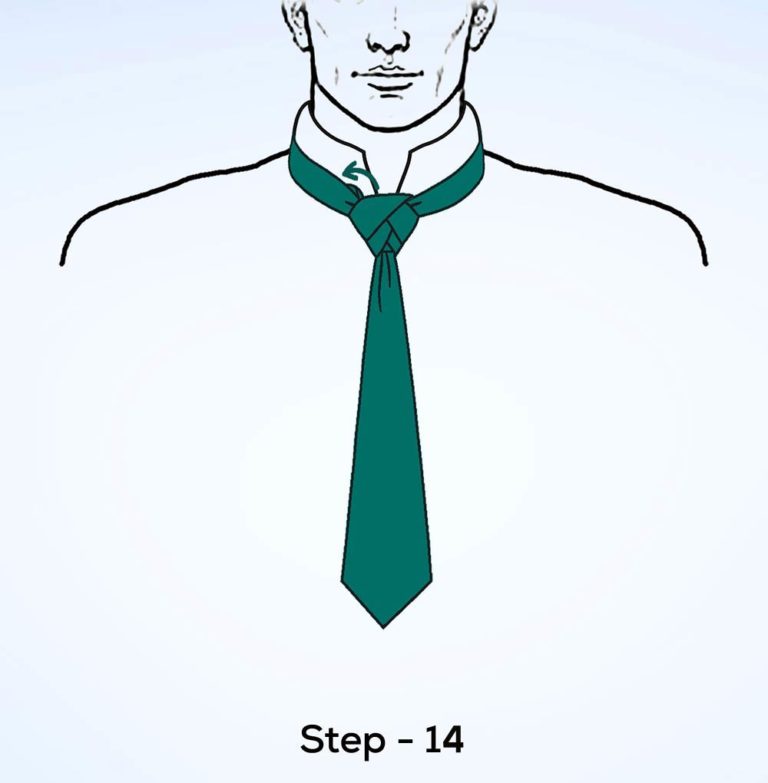
STEP-14
Fourteenth step, Tuck the rest of the small end behind neck loop on the left side.
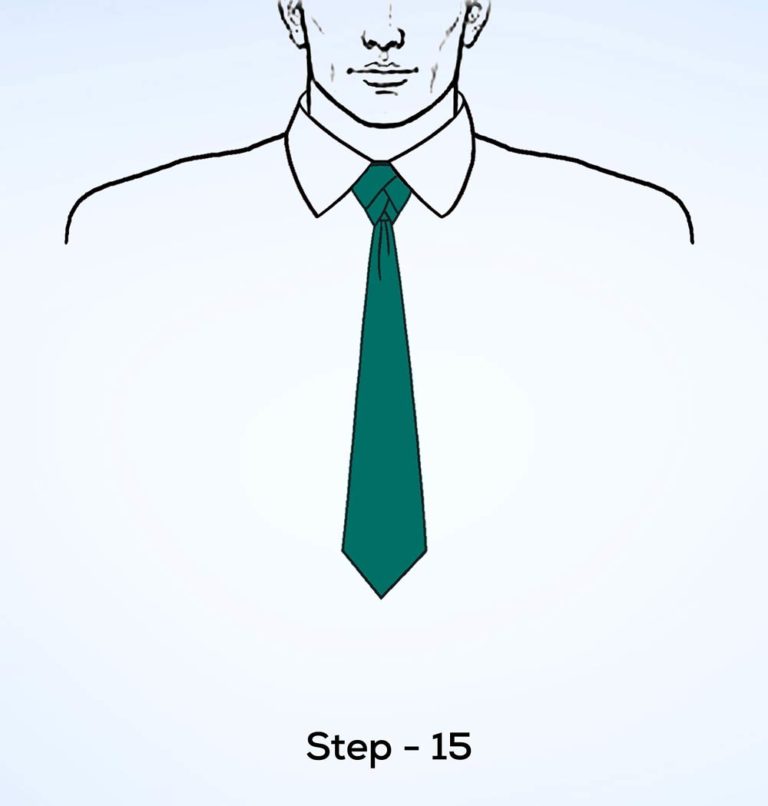
STEP-15
Fifteenth step, Strut your stuff.
Below are other ways to tie a tie, whether it is a tie or if you are looking for a challenge to learn. Our step-by-step guides will help you with 15 classically popular neckties knots.

