Malasana (Garland Yoga Pose) Benefits, Steps, Precautions, Tips

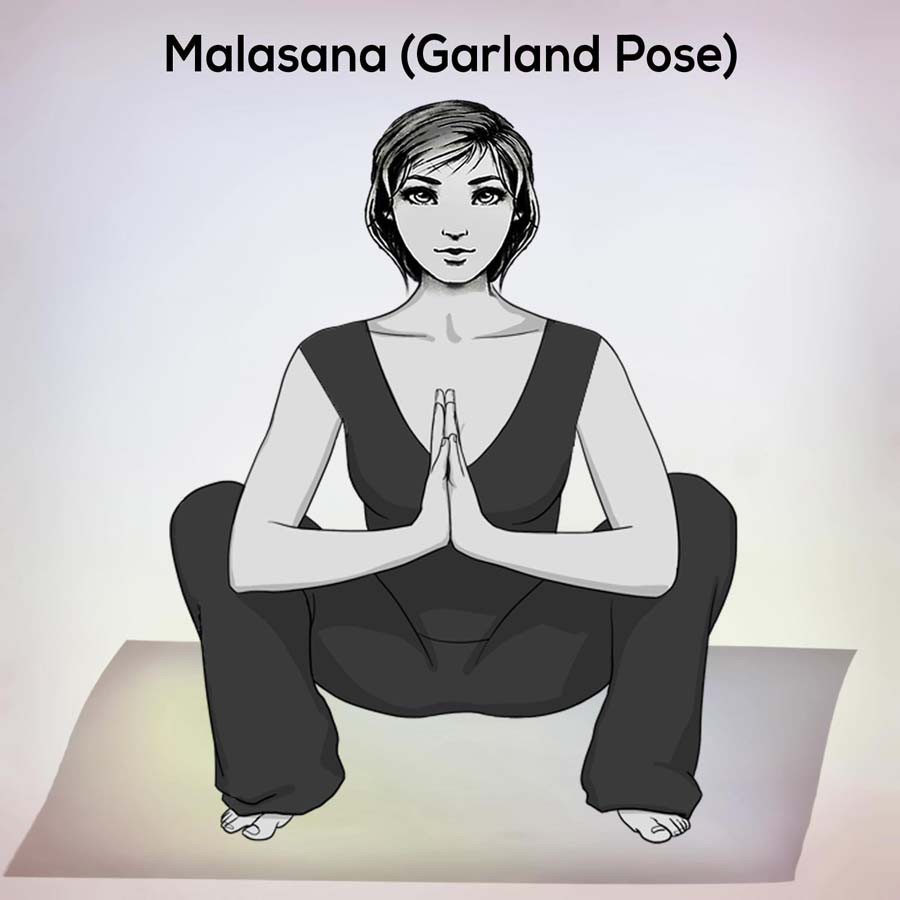
The word Malasana comes from two Sanskrit words Mala in Sanskrit means necklace or garland and asana is for posture, asana or mudra. This pose is also known as “squat pose” or “upavasana”. This is, basically, a squat.

Yoga simply does not have to do with toning and flexing muscles. It is a kind of science and science agrees with the fact that it helps in reducing the symptoms of many diseases. Each yoga pose targets different muscles of the body and has some specific health benefits. The same situation is with Malasana.

Getting into a squatting position while doing the malasana puts pressure on your abdominal muscles and improves the function of the colon to help elimination. And it also improves balance, concentration, and meditation. It can also increase circulation and blood flow in the pelvis, which can help regulate sexual energy. The special feature of this asana is especially good for pregnant women as it can help in childbirth later.

This article gives you the right way of Malasana, the health benefits of Malasana and the precautions to be taken while practicing it.

A Girl doing a Malasana. It is also called Garland Pose.

Malasana (Garland Pose) steps: The right way to do Malasana

1)- First, you stand on the top of your mat.
2)- Now keep your two legs apart, and there should be a distance of 2 to 2.5 feet between the two legs.
3)- Now bend your elbows, bring your palm together in the Anjali Mudra (Prayer position) and ensure the hands near the chest.
4)- Now, bend the knees of your feet and sit slowly downwards, in this posture you will come for bowel movements.
5)- In this position, place your hips above the ground and sit on the soles of the feet.
6)- Now, in this case, keep your thighs wider than the upper part of the torso.
7)- Make sure your hips are very close to the ankles and pull your shoulders back.
8)- Now you exhale and bend forward as if your torso is stuck between your thighs.
9)- Make sure that Combine both of your hands are in such a position that there is a 90-degree angle at the elbow. Then keep the elbows of both hands inside the thighs, doing this will help you to expand the front part of your torso.
10)- Stay in this posture for at least one minute. Then stand to get into your initial state, bring your hands straight down.

Benefits of Malasana (Garland Pose)

Malasana (Garland Pose) has some excellent benefits. The points given below are as follows.

  • Malasan helps to spread your thighs, waist, hips, ankles, and torso.
  • Malasana tones your abdominal muscles and improves the function of the colon which helps in elimination.
  • Malasana pose also increases circulation and blood flow in the pelvis, which can help control sexual energy.
  • This asana improves balance, concentration, and focus.
  • Malasan is particularly beneficial for pregnant women, as it may aid later childbirth.
  • Hip flexibility is a common problem for many people today. Nowadays, many people sit and work for long periods of time in the office, their inner thighs, waist, and hip flexibility can be shortened and tightened – which can lead to poor posture and back pain. Garland Pose is a hip-opening yoga pose that helps lengthen and open the hips, creating greater mobility for all your daily activities.

Precautions to take while doing Malasana (Garland Pose)

Malasana (Garland Pose) may be good for your health, but here are some precautions you should follow:

1)- If you are suffering from knee or lower back pain, avoid Malasana (Garland Pose).
2)- Before rehearsing Malasana (Garland Pose), you should try to keep your stomach and intestines empty.
3)- Eat your meal at least four to six hours before performing the Malasana (Garland Pose) so that your nutrition is processed and there is enough vitality for you to use during exercise.
4)- Practice and guidance are very important, so keep practicing under the supervision of a specialist.

Some Important Tips

Practicing Garland pose can be a great way to keep your body in balance and loosen tight hips. This can be difficult to do at first, but with constant practice your muscles will lengthen and you will be able to squat. Keep in mind the following information while practicing this mudra.

  • Avoid jerking, pulling, pushing, or forcing any movement while practicing this pose. Allow your movements to be slow and smooth.
  • When you practice this posture you keep changing your weight back into your heel.
  • While practicing this mudra, extend your torso towards the front and keep your spine straight, not round.
  • When you practice this pose, do not bounce your hips up and down. Doing so may put more pressure on your hip flexors and knees.

 Legal Disclaimer: Before participating in any exercise program or using any fitness products or services that may be described and/or made accessible in or through the Nexoye Website and/or the Services, you should consult with a physician or other healthcare provider.